So here we have it: the brand new Clans system! We're sure you can't wait to start your Clan and head out on a marauding mission. But there are loads of great features to explore, and we wouldn't want you to miss anything. So, read on to find out how to create your Clan, find new members, assign your hierarchies, run events and generally live out your ultimate Clan-tasy!

Clan Hub
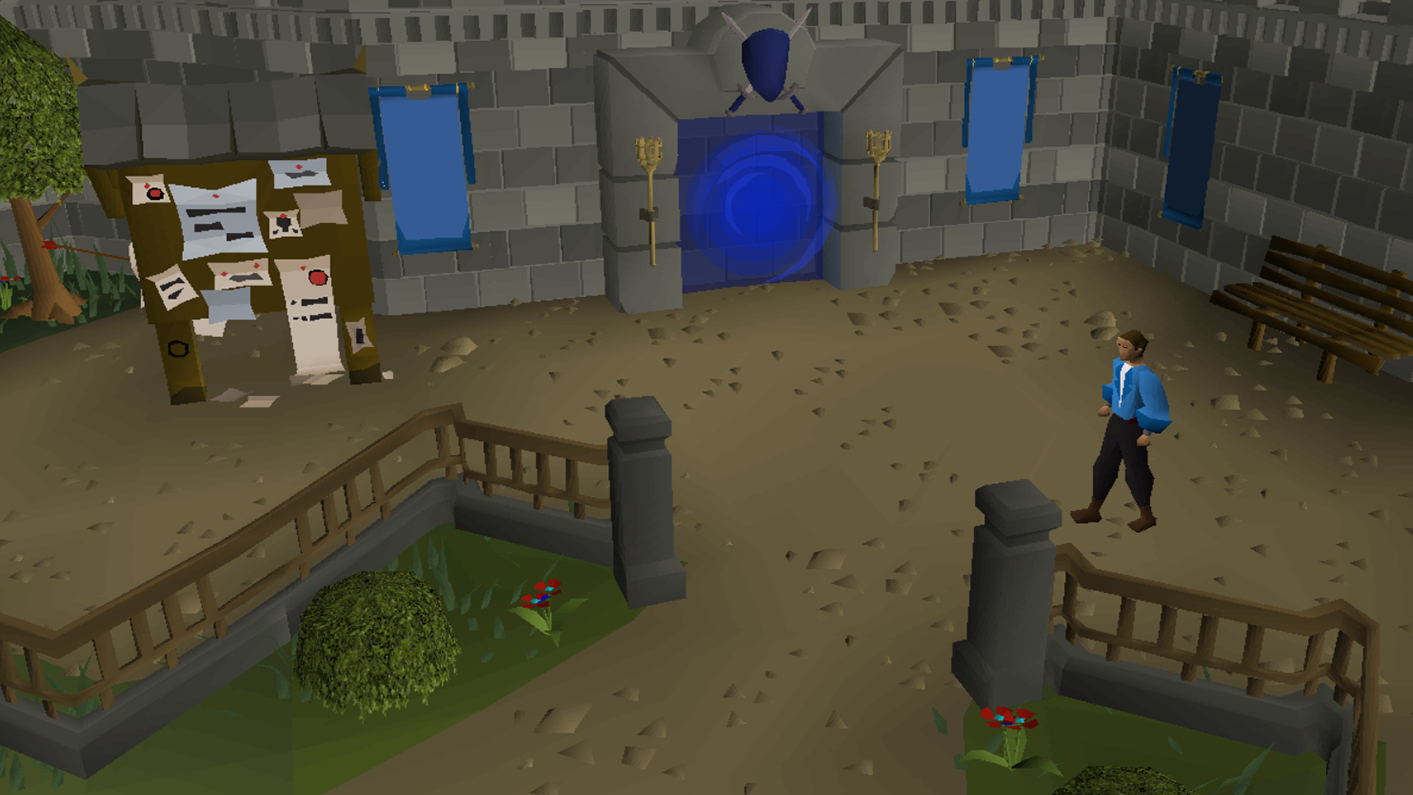
First things first, wannabe Clan-atics will need to head for the Clan Hub, located in the south-eastern corner of the bustling Grand Exchange. Here you can set up or join a Clan or head through the portal to a Clan Hall.
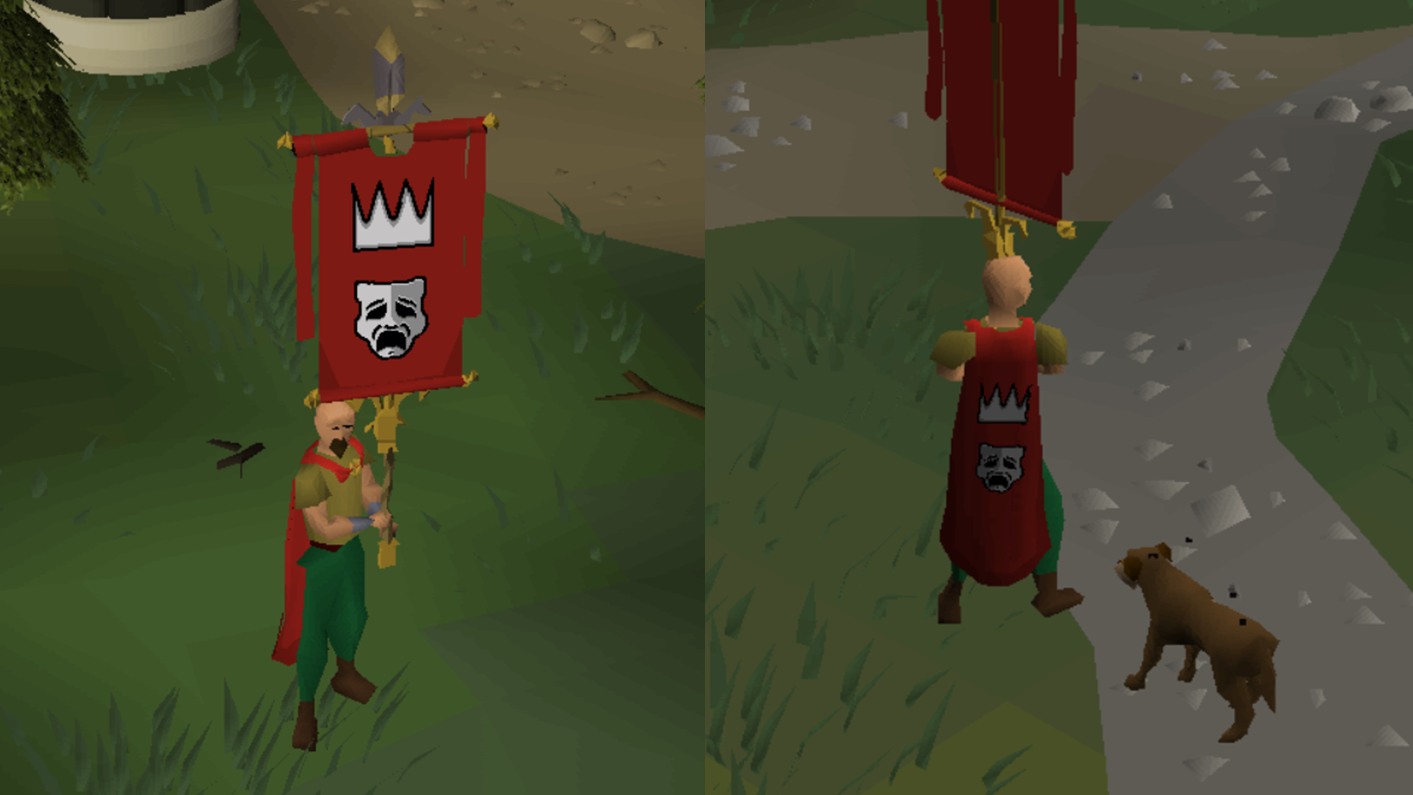
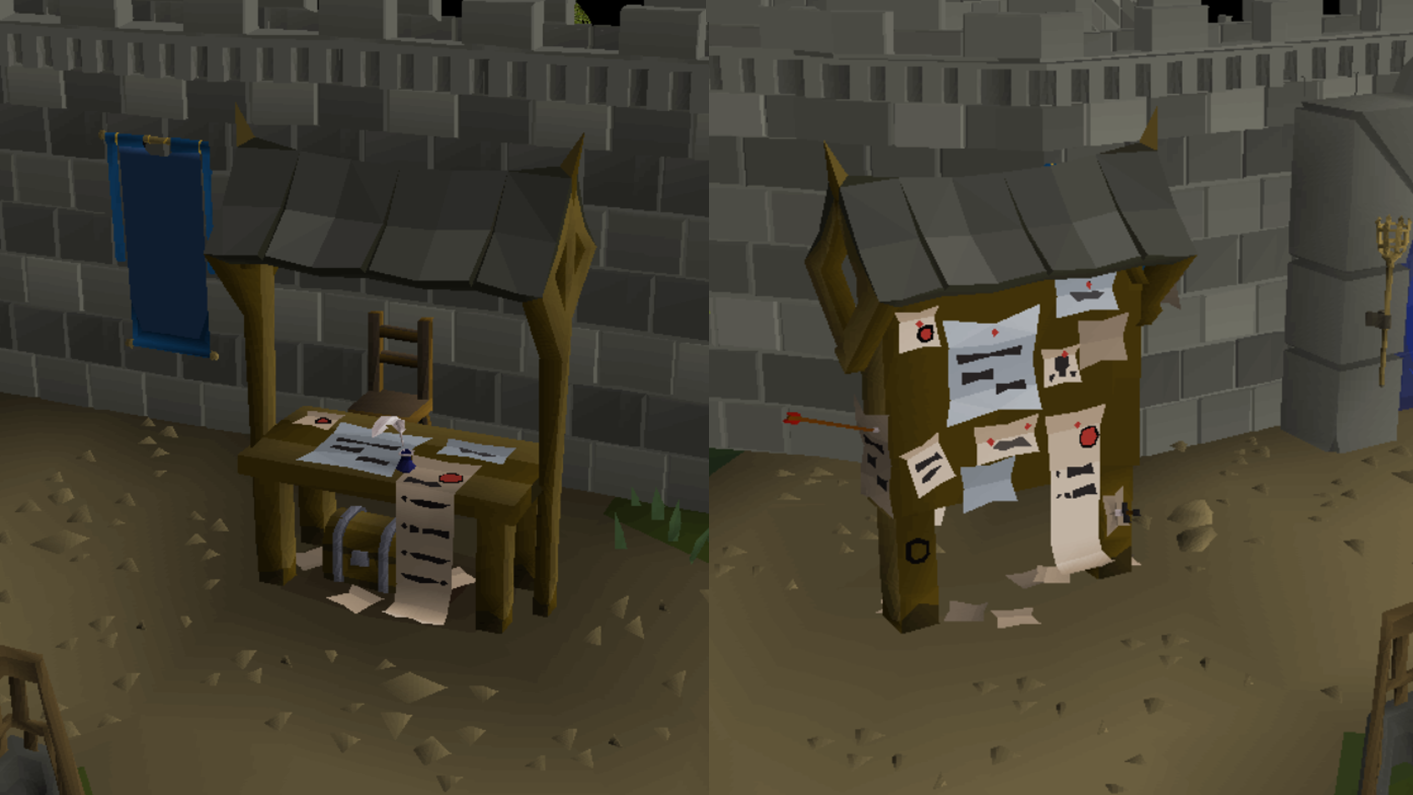
If you've got a question about setting up or joining a Clan, chat to the Clerk. This fine fellow is your go-to for all your basic info. He will also give you your Clan's Cape and Vexillum, which will display your signature Clan icon (and help you dazzle when it comes to advertising to new members). Basically, he's your new best friend, so head to him first.
Next, the Recruitment Board is your one-stop shop for recruitment and applications. Whether you're looking to advertise for new members, or want to find an already-established Clan to call your own, the board is the key to finding your fighting fam.
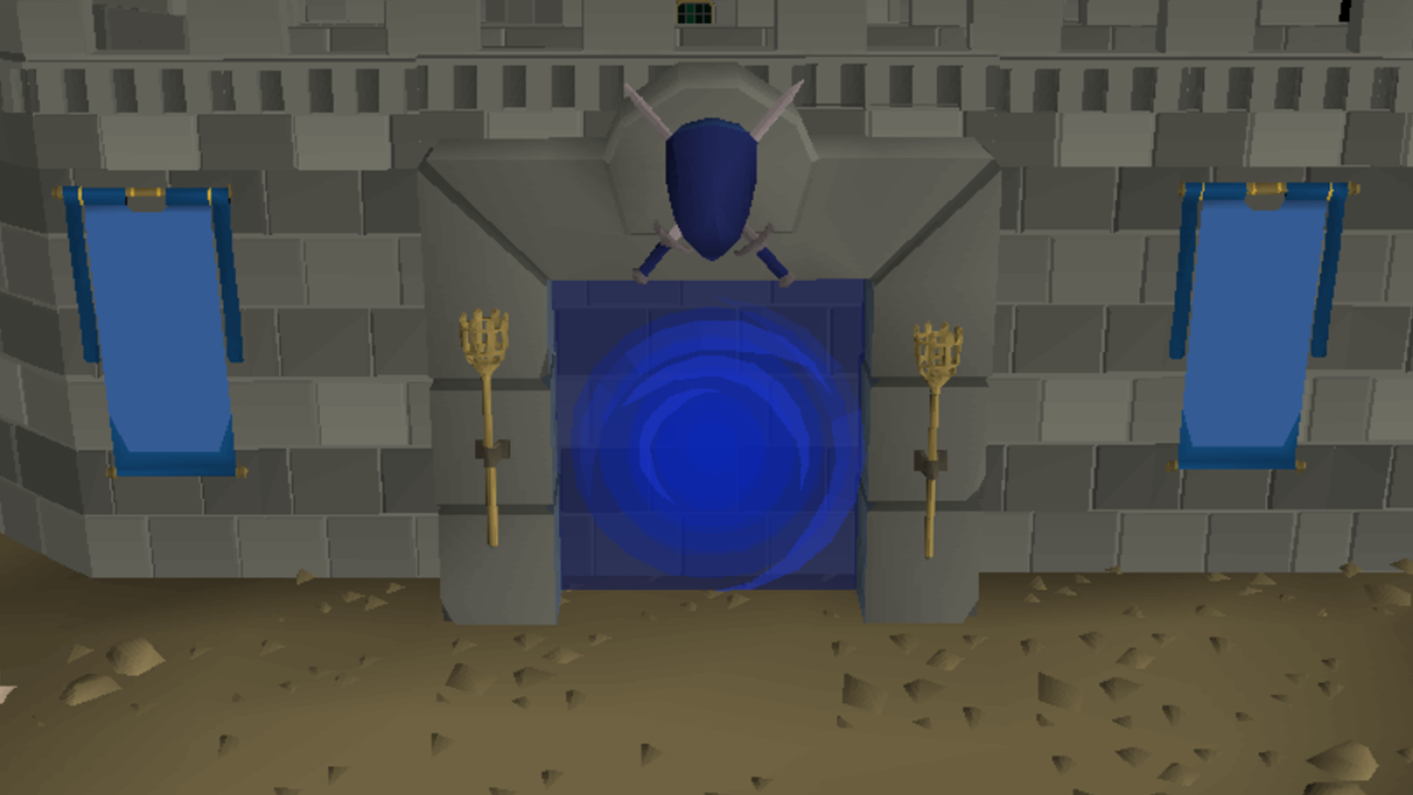
Once you're part of a Clan, step through the ripples of deep blue that is the Clan Portal! This will take you to the Clan Hall. It will be your Clan's base for social gatherings, event preparation and more!
Creation
It's really easy to create a Clan! If you'd rather browse Clans to join instead, you can head straight down to the Recruitment Board section of this blog for more info.
To create your own Clan, you'll need to have spent at least 25 hours in-game, and have at least five players gathered in the Hub to form a Clan (players can always leave after the Clan is formed). You can have up to 500 members.
Providing you meet these requirements, head over to the Clerk. By asking him "Who are you?", "What's a clan?" and "I would like to create a Clan", you can begin the process.
Most importantly, you'll need to give your new squad a name! Will the name reflect you, the Clan leader? Or tell a story? Or brag about your group's might and muscle? Be aware, you only have 12 characters to play with and there are limits to how often you can change it, so choose your name wisely! The Clan Database will then double-check if your name is available. This name isn't automatically reserved, and you'll need to hit Create to claim it for real.
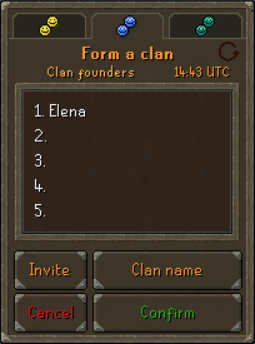
Alright, time to invite members into your group! There are two methods for inviting people: you can right-click a player in the area to invite them, or use the Invite button on the Clan Creation side panel. Note that this panel is only available in the Hub, and only to those who are not in a Clan already (we'll touch more on inviting other players to your Clan later).
The Clan Creation side panel has the following options:
- Invite: Press this and click on a player to recruit them.
- Clan Name: This does not reserve the name - it only checks whether it's available.
- Confirm: This button checks that you have the required number of people, and if you didn’t select a name already, it will ask you what unique name you’d like for your Clan. Once everything is ready, a Clan will be formed with the initial founder as the owner. Ranks for members will be set up automatically, but these can be changed at your leisure (more on this later).
- Cancel: Ends the Clan creation process, if you are the initial founder. Founding members can also access the button, but don't worry, it will only allow them to leave the Clan. Cancelling does not count towards your daily limit of forming one Clan - you can interrupt as many Clan formations as you want. Once the Clan has been confirmed you will be unable to form more that day.
Clans Settings
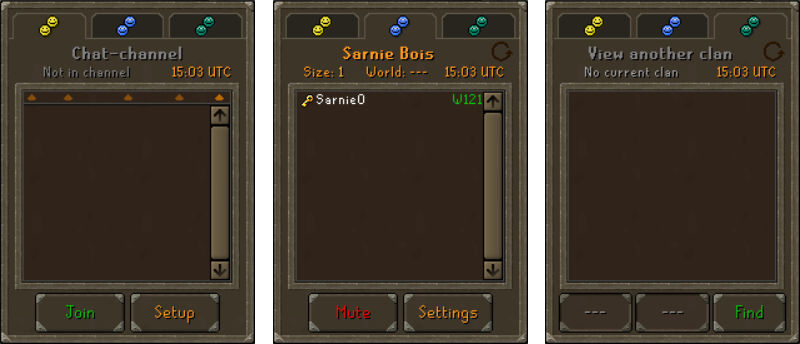
Congratulations, you've just started your very own Clan! This is was your first big decision as Clan Leader, but don't worry... we've got plenty more options for you to toggle and tweak! On your control menu, select the Clans panel (two smiley faces) and you'll find three sub-sections:
- Chat-Channel (Yellow): This section will allow you to create and join different chat channels within your Clan, and customise who can enter, speak and take action inside your group discussions.
- Your Clan (Dark Blue): This is your main way of keeping an eye on your current Clan members, checking details about your Clan and playing with the settings.
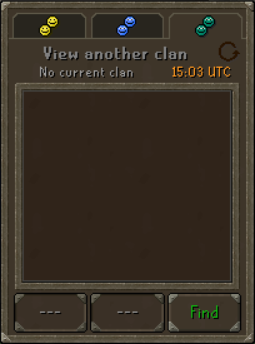
- View another clan (Cyan): Check out the competition! Use this tab to search up any registered Clan, have a look at their members, and more!
Let's take a deeper dive into the Settings options we've just mentioned, as there's a lot to unpack here.
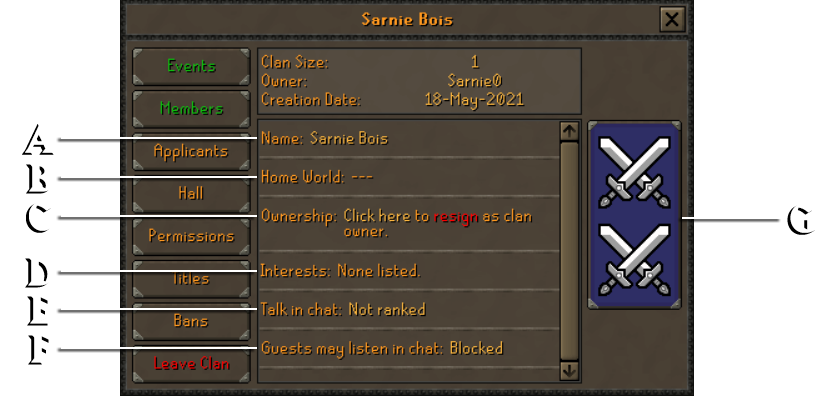
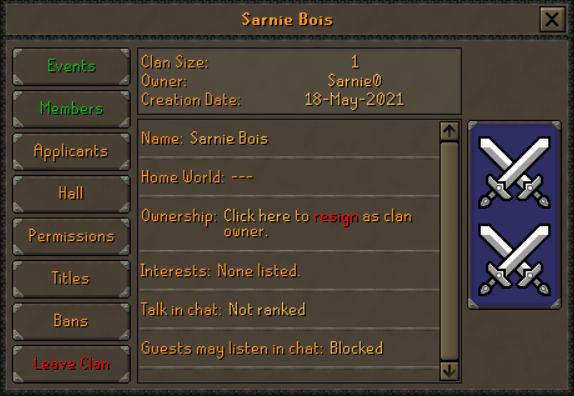
On the initial panel you'll find a quick overview of your Clan size, who the owner is and the creation date, along with the following information that can be changed:
- Name (A): Click here to change it, up to once per week. Other players can click here to report you if your Clan's name is offensive.
- Home World (B): Set the main world your Clan will call home.
- Ownership (C): Shows the current owner and gives them the option to resign (or delete the Clan, if there are no other members).
- Interests (D): Highlight the interests of your Clan (PvP, Raiding, Iron players, etc) so you'll show up on relevant searches.
- Talk in chat (E): Set which players can use your chat.
- Guests may listen in chat (F): Allow guests to see the Clan chat (and decide whether they're able to participate).
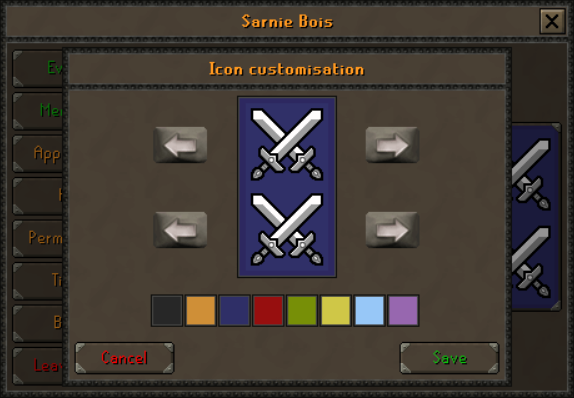
- Clan Banner (G): This is how your Clan will stand out from the rest... by clicking this you'll be able to customise your Clan's banner, and the icons, which will feature on the items you receive from the Clerk!
Events
Want to get your Clan together to take on Theatre of Blood, battle a rival Clan, or just Chill & Skill?
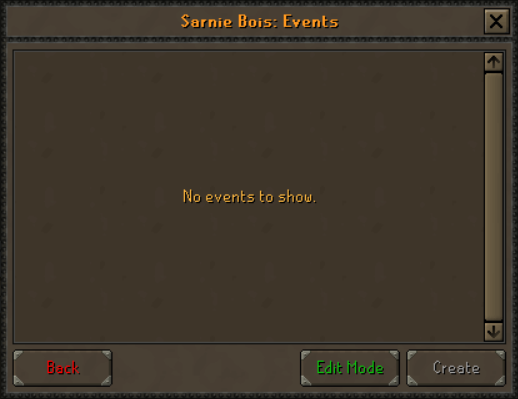
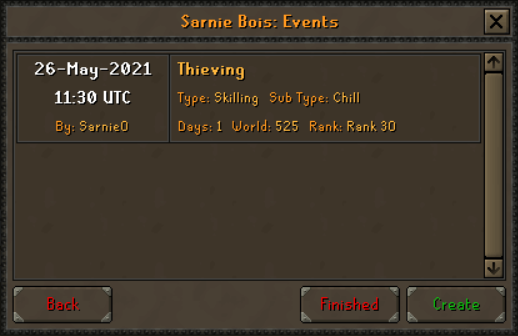
The Events tab is the home for all of your upcoming activities. You and high ranking members of your Clan will be able to create events, and it's super easy:
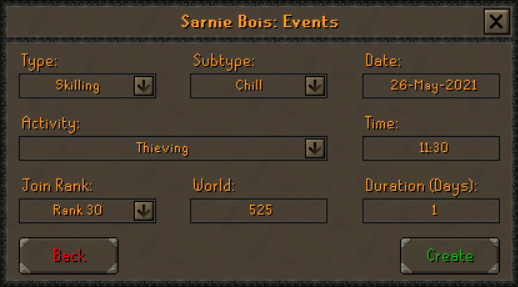
1. Use the Edit Mode button on the bottom right of the interface and then the Create button.
2. Adjust your settings to fit the event, and when you're happy with your choices, hit Create.
3. Press the Finished button once you've created all of the events you want to showcase.
By using the Edit Mode option, you'll also be able to select any event and edit its details, as well as delete any that aren't relevant anymore.
For the final 24 hours before an event, any Clan member that logs in will receive a notification letting them know about it. This will only happen to the player once per day.
Members
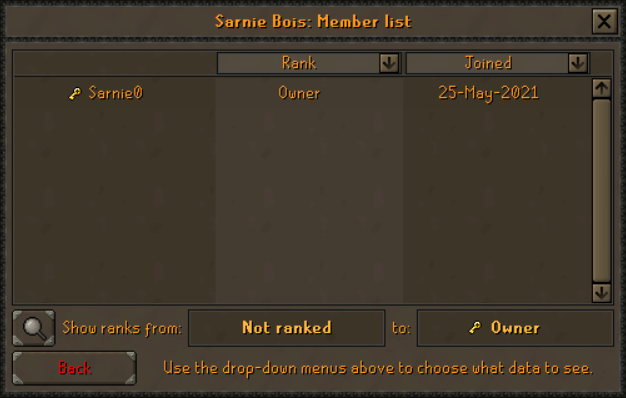
The Members list will show you a complete list of every loveable rogue in your Clan, as well as a plethora of juicy data.
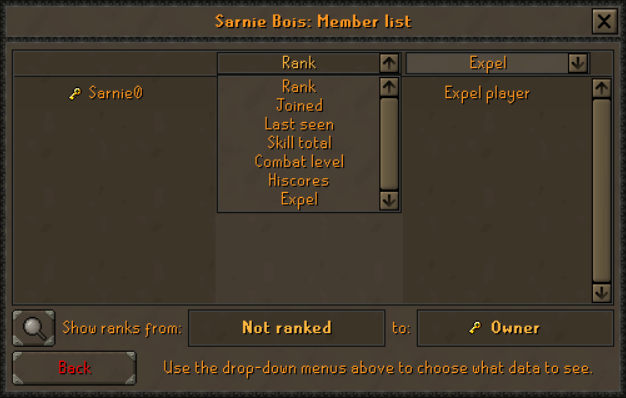
From the drop-down menus at the top of the interface, you can select from the following options: Rank, Joined, Last Seen, Skill Total, Combat Level, HiScores and Expel.
Say you only want to have a look at Rank 70s and above - you can add those filters to your members list. Each of the filters selected will have a handy tip at the bottom that will tell you the limitations of the data. Or, maybe there's a current member you're looking for? You can simply use the magnifying glass in the bottom left to search for them.
Not only can you see certain stats here, but you can also take action in a worst-case scenario! Selecting the Expel option will allow you to remove members from your Clan... but we hope you won't need to do this. You can also change the standing of a member by selecting the Rank option and then clicking on that player's rank.
Applicants
So, the Clan's looking good. Time to grow your number, maybe? Advertising your Clan is the best way to go about expanding your new 'Scaping crew.
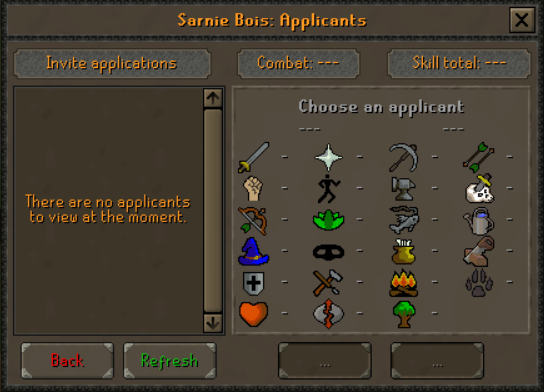
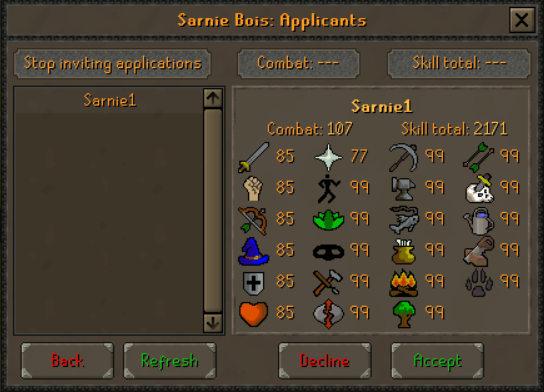
Within the Applicants interface, use the Invite Applications button on the top left of the box to show the world you're ready to recruit. Note that you'll have to set the Combat level and Skill Total restrictions with the buttons along the top. Only want the best of the best? This is how you find them.
Once you've begun inviting applications, wannabe recruits will be able to click the Apply button. They can do this from anywhere in the world - you won't have to meet up with them if you don't want to. For maximum visibility, you can also list your group on the Recruitment Board in the Clan Hub.
To accept an application to your Clan, simply click on a name in your applicant list, and you'll instantly see all their stats. If everything looks good, click Accept. If someone doesn't quite meet your criteria, then you can simply hit Reject. All players, whether they've been accepted or denied, will receive a message within Game Chat letting them know the verdict.
If you feel that your Clan has enough members for the meantime, click Stop Inviting Applications.
Hall
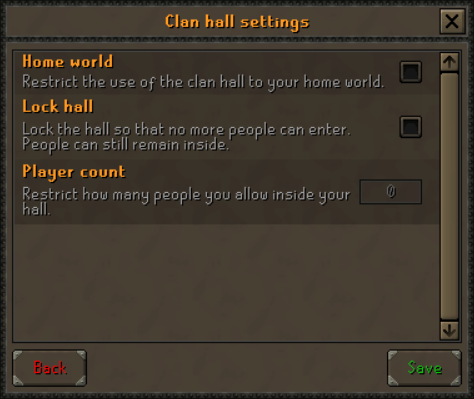
We'll sink our teeth into the full capabilities of the Clan Hall a bit later on, but with this menu, you have a few options that can help you control access to this sacred space. You're the bouncer now!
- Home World: Restrict the use of the Clan Hall to your home world.
- Lock Hall: Lock the Hall so that no more people can enter (those already inside can remain).
- Player Count: Restrict how many people are allowed inside.
Permissions
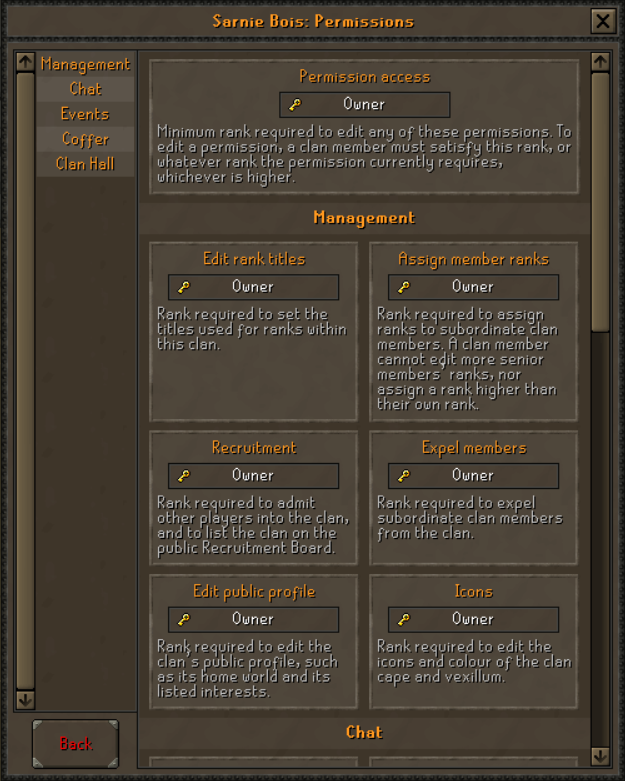
Time to make sure your Clan is managed in the right way. Here's what you can do from the Permissions menu:
- Permission Access: This is the grand command. Set what ranks of members can edit all the settings in the Permissions interface. Make sure to be careful with this setting - with great power comes great responsibility, and all that...
- Management: Set who can manage rank titles, assign member ranks, edit recruitment settings, expel members, edit your public profile and change the icons/colour of your Clan.
- Chat: Change who can talk, kick people from the chat and wield the mighty ban button. Set the guest minimum combat level, skill total, quest points and Iron status.
- Events: Set the parameters for who in your Clan can organise/edit events and who can send and receive challenges for Clan Wars on behalf of the Clan.
- Coffer: The purse strings! Decide who you can deposit and withdraw from the Clan's Coffer.
- Clan Hall: Choose how your members can enter the Clan Hall.
Any changes will be applied automatically, so make sure to choose the right ranks for Permissions. All ranks positioned above the selected one can also edit those options!
Titles
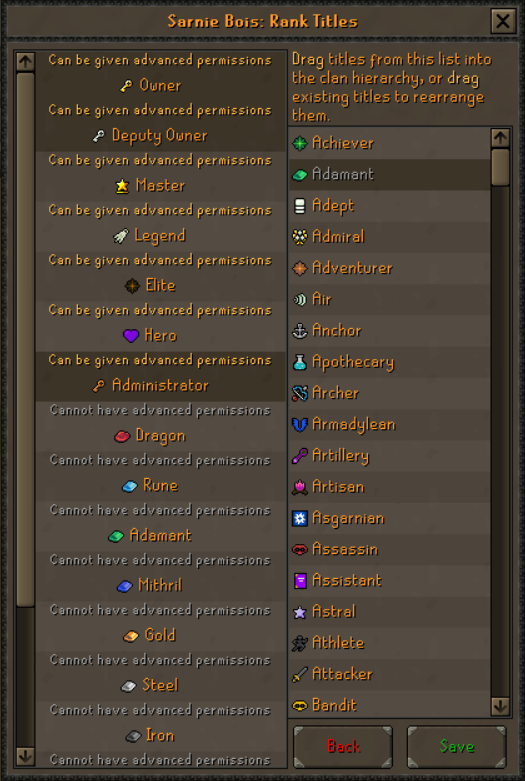
This is where you set the hierarchy within your Clan. If you don't like the default naming conventions for these ranks, check out the list on the right-hand side. By simply clicking on the desired title and dragging it over to the appropriate rank, you are able to rename all of your ranks apart from Guest, Administrator, Deputy Owner and Owner. You can also swap already assigned titles between different ranks, by click and dragging the title from one rank to another. Once you're happy with your choices, press Save.
You can find a full list of available titles and ranks here thanks to our friends at the Old School Wiki team!
Bans
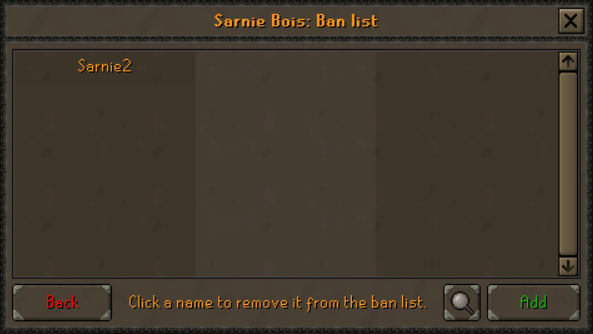
The Ban list will show you all current players that are barred from joining the Clan's chat, or entering the Hall as a guest. You can search for specific players by clicking the icon in the bottom right corner of the interface. Reset the search filter by clicking on the icon again.
If you need to add a player to your list, use the Add button and then type in the name of the player and hit enter. If you're looking to do the opposite, then simply click or right-click and select Un-Ban on the player.
Leave Clan
If you wish to join another Clan, or you want to go back to being a lone wolf, the Leave Clan button is your escape. Remember, if you are the owner of a clan, you'll need to resign first!
If you're looking to step down as leader of your Clan there's a 7 day countdown before you can do so, alternatively if the Clan has no members, abdicating will delete the Clan instead (along with a 7 day countdown).
Clan Recruitment Board
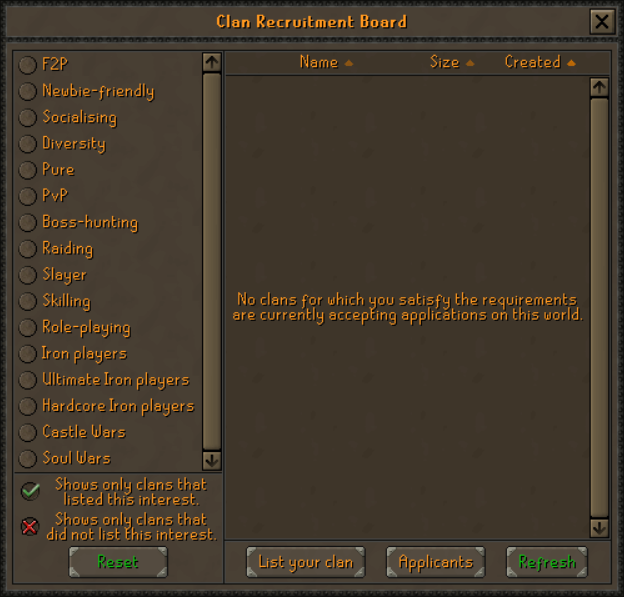
The Clan recruitment board allows you to advertise your Clan, or find a Clan that suits your inimitable style. By clicking on the board, you'll be greeted by an interface showcasing a list of different styles of play on the left side, from UItimate Ironmen to free-to-play. Use the ticks and crosses to filter the results, or Reset to start again.
You'll be able to see all the Clans you're eligible to join, and you can sort them by name, size and date created using the filters at the top. If you find any offensive names within the list, please do right-click and select the Report Name option (thanks!).
Applications
Ok. You've found them. The Clan of your dreams. This is the big one.
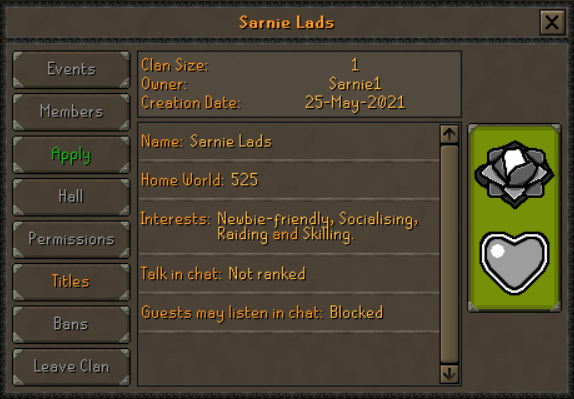
Fortunately, applying is super easy! All you have to do is click on the Clan and you'll be greeted with an overview screen.
Hit the Apply button on the left-hand side. A confirmation box will appear. If you select Yes, your application will be submitted. If you've changed your mind about the Clan you've applied for, you'll be able to click Withdraw from the same screen.
For owners and recruiters of Clans, head over to the board and make sure that Invite Applications is active on the Applicants menu in your Clan Settings (or use the Applicants button on the Recruitment Board interface). Once this setting is on, you'll be able to push the List Your Clan button on the Recruitment Board. You can de-list your Clan at any time using the same board.
Clan Chat
Now that you've either founded or joined at Clan, you can get to gossiping. As we mentioned in last week's post, your chat options have changed slightly, and you'll see that a new box has been added for Clan Chat.
By using the Clan panel on the chatbox, you can send messages using '//' or '/c' followed by your message (assuming the higher ranks of the Clan allow your rank to do so).
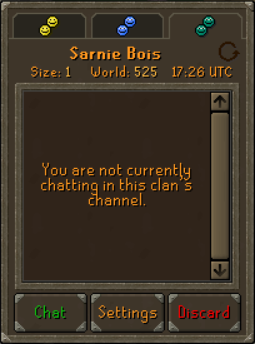
Some Clans you're not a member of will allow you to join the chat as a guest. Search for the Clan's name in the View Another Clan section (teal) of the Clans control panel. By using the Find button, you can search for any registered Clan. If a Clan is found under that name, you'll be presented with three new options:
- Chat: This will allow you to join a Clan's chat as a guest, if possible. Once you've joined as a guest, you can chat with '///' or '/g', as long as the Clan settings permit it. Guests can exit from a Clan chat by pressing Leave.
- Settings: This shows you Clan details, and may give you the option to apply if applications are open.
- Discard: This allows you to clean your search, and takes you back to the original screen.
The Channel button on the chatbox is what was the original Clan chat, and this can still be used to join other chats you're interested in. By going to the double smiley face (yellow) on the Clans control panel you can create your own chat with the 'Setup'. You can set this up in any way you want by right-clicking any of the option boxes on the left-hand side and selecting the appropriate settings. You can type in this chat by typing '/' in the text box. If you're only looking to chat in someone else's channel then you can simply hit Join and type the player's name.
Clan Halls
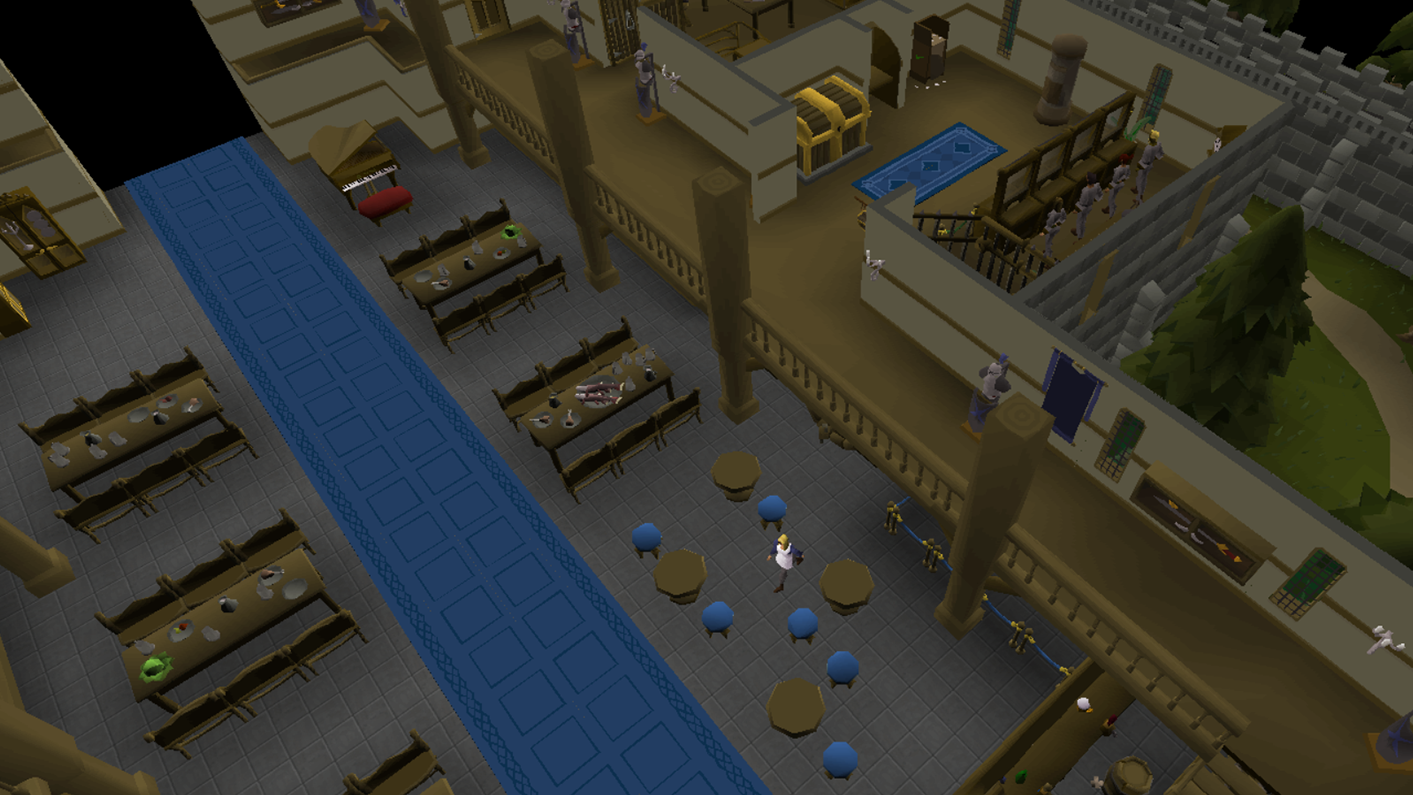
Every registered Clan will have their very own hall to call their own. It's the perfect place to hold team meetings, get prepared for your next adventure, or simply hang out with some fellow Clan members and soak up those exclusive-club vibes!
Who can enter your Clan hall is dependent on Permissions. If you're a high enough rank to enter a Hall, then you can simply click on the portal.
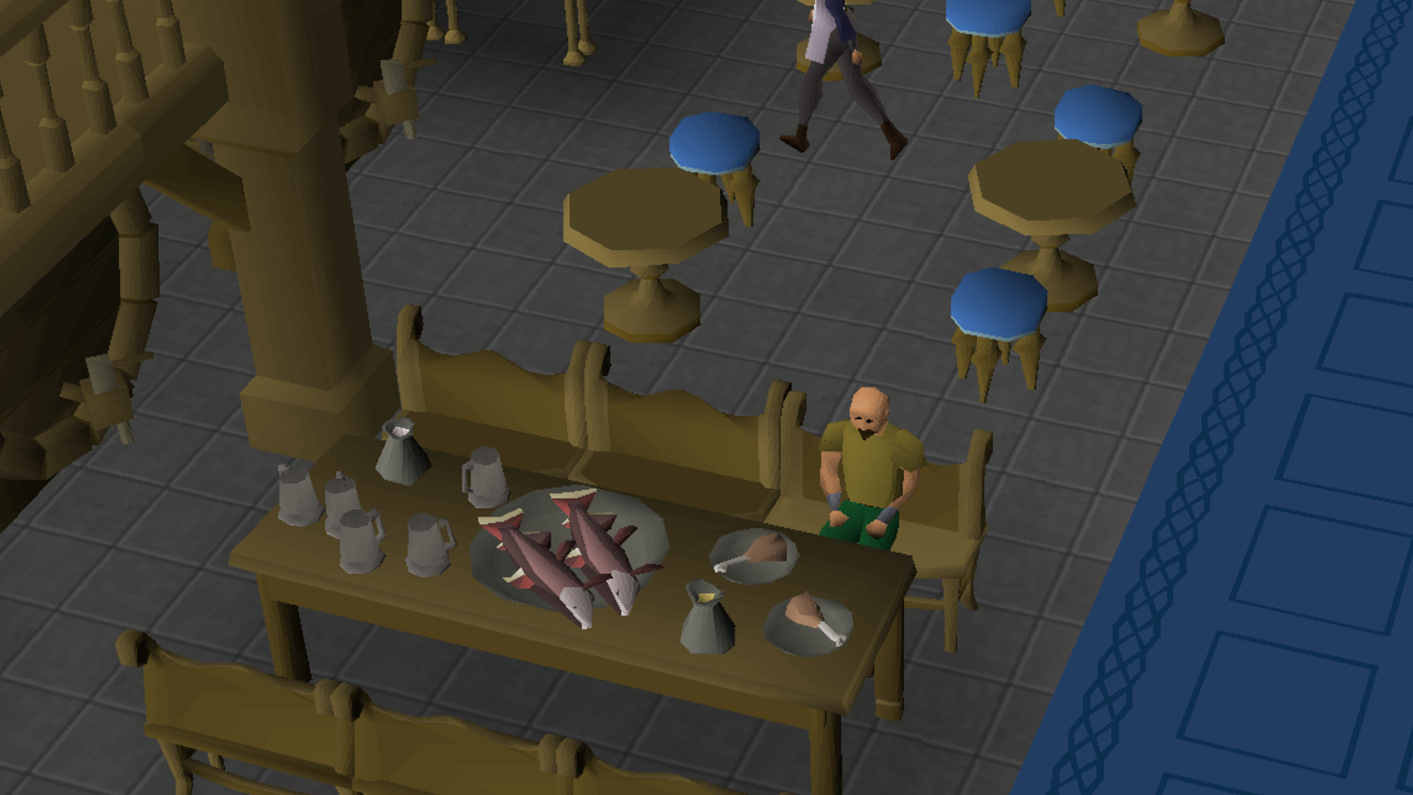
Once inside, you'll be greeted by a grand room with luxurious furniture, ornaments and more. If you fancy hanging around with some other members, grab a beer (for five coins) from Raqueel at the bar, and take a seat at one of the many tables.
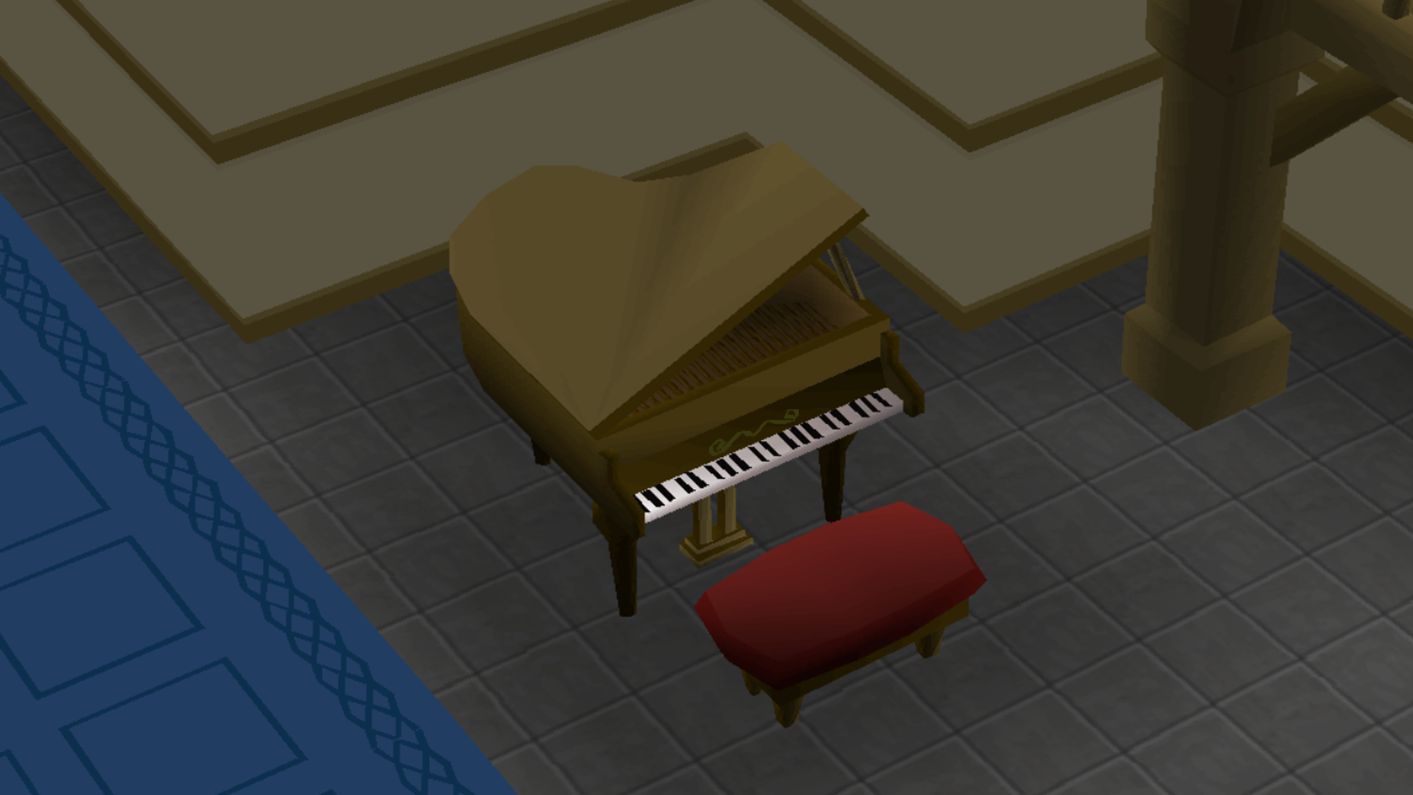
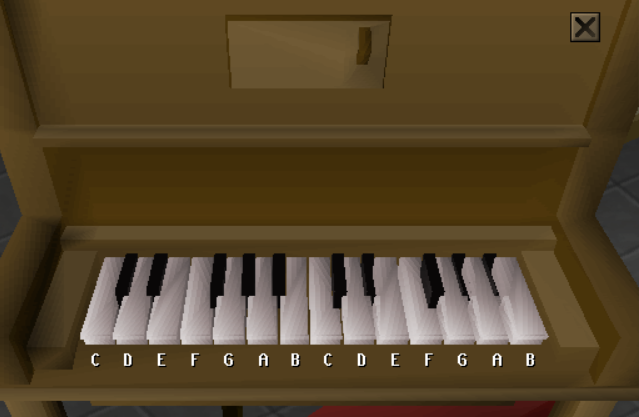
If you're hosting a merry event and want to set the mood, head on over to the Piano and you can entertain your members with a recital of your choice! Encore! This option will let everyone in your Clan hear your tinkling, so before you start smashing the keys, remember you have an audience. If you just fancy a quick practice, then right-click and press Play Quietly to, err, keep that racket to yourself.
If you're playing quietly, you don't just have to use the mouse to interact with the keys either; players with a keyboard can use buttons in the number row including: ` - = and BACKSPACE to jam on the piano.
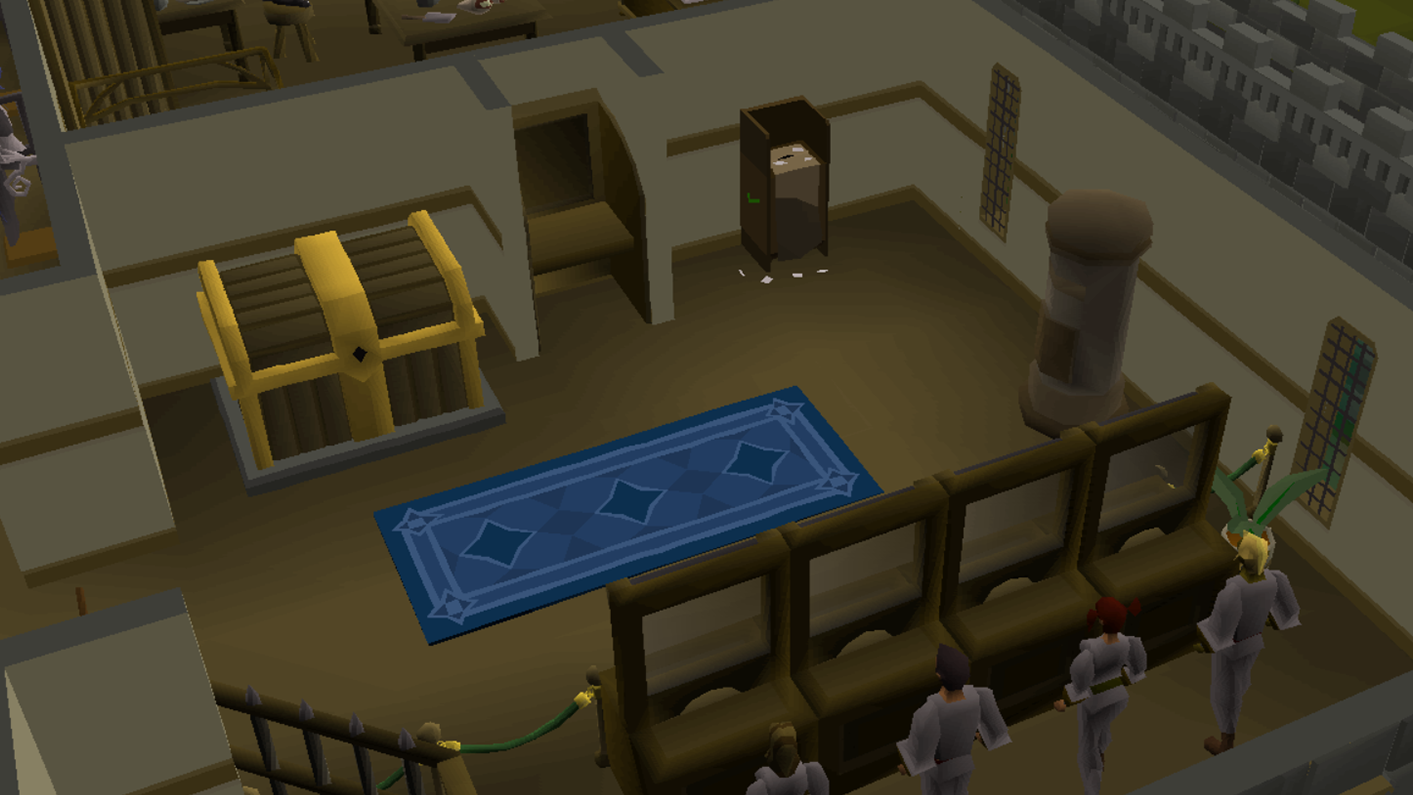
On the first floor, you'll find a range of useful features including an Altar, an Oven, a Sink and a Bank. Your Bank has all the usual facilities, including four bank booths, a deposit box and a poll booth, plus the all-important Clan Coffer!
Relevant members will be able to add and withdraw money from the Coffer, with the maximum value of 1,000,000 coins being held at one time. As the Clan system's infrastructure is so new, we've set this limit to the Coffer for safety. If it functions well, we will be able to raise this limit in future. Players are not notified when someone puts money into the Coffer, but are always notified when someone takes money out of it.
Iron players will not be able to withdraw or deposit any money from the Coffer. Even in a Clan, the Iron player remains on their own!
That's everything for our Clans guide! We'd love to hear your feedback so please let us know what you think via our official forums, on the OSRS Discord in the #gameupdate channel.

Mods Acorn, Arcane, Archie, Argo, Ash, Ayiza, Banjo, Boko, Bonsai, Brow, Bruno, Curse, Daizong, Deagle, Dibber, Ditto, Dylan, Ed, Elena, Errol, Fed, Flippy, Gecko, Grub, Halo, Husky, Jndr, John C, Kandosii, Katies, Kieren, Kirby, Lenny, Light, Lottie, Mack, Maylea, MikeD, Morty, Nasty, Nin, Oasis, Roq, Ry, Sarnie, Squid, Steve W, Sween, Tide, Vegard, West, Wolfy & Zuko
The Old School Team
