
"Life is a game. What would make you think that death is any different?" - Rasial, The First Necromancer
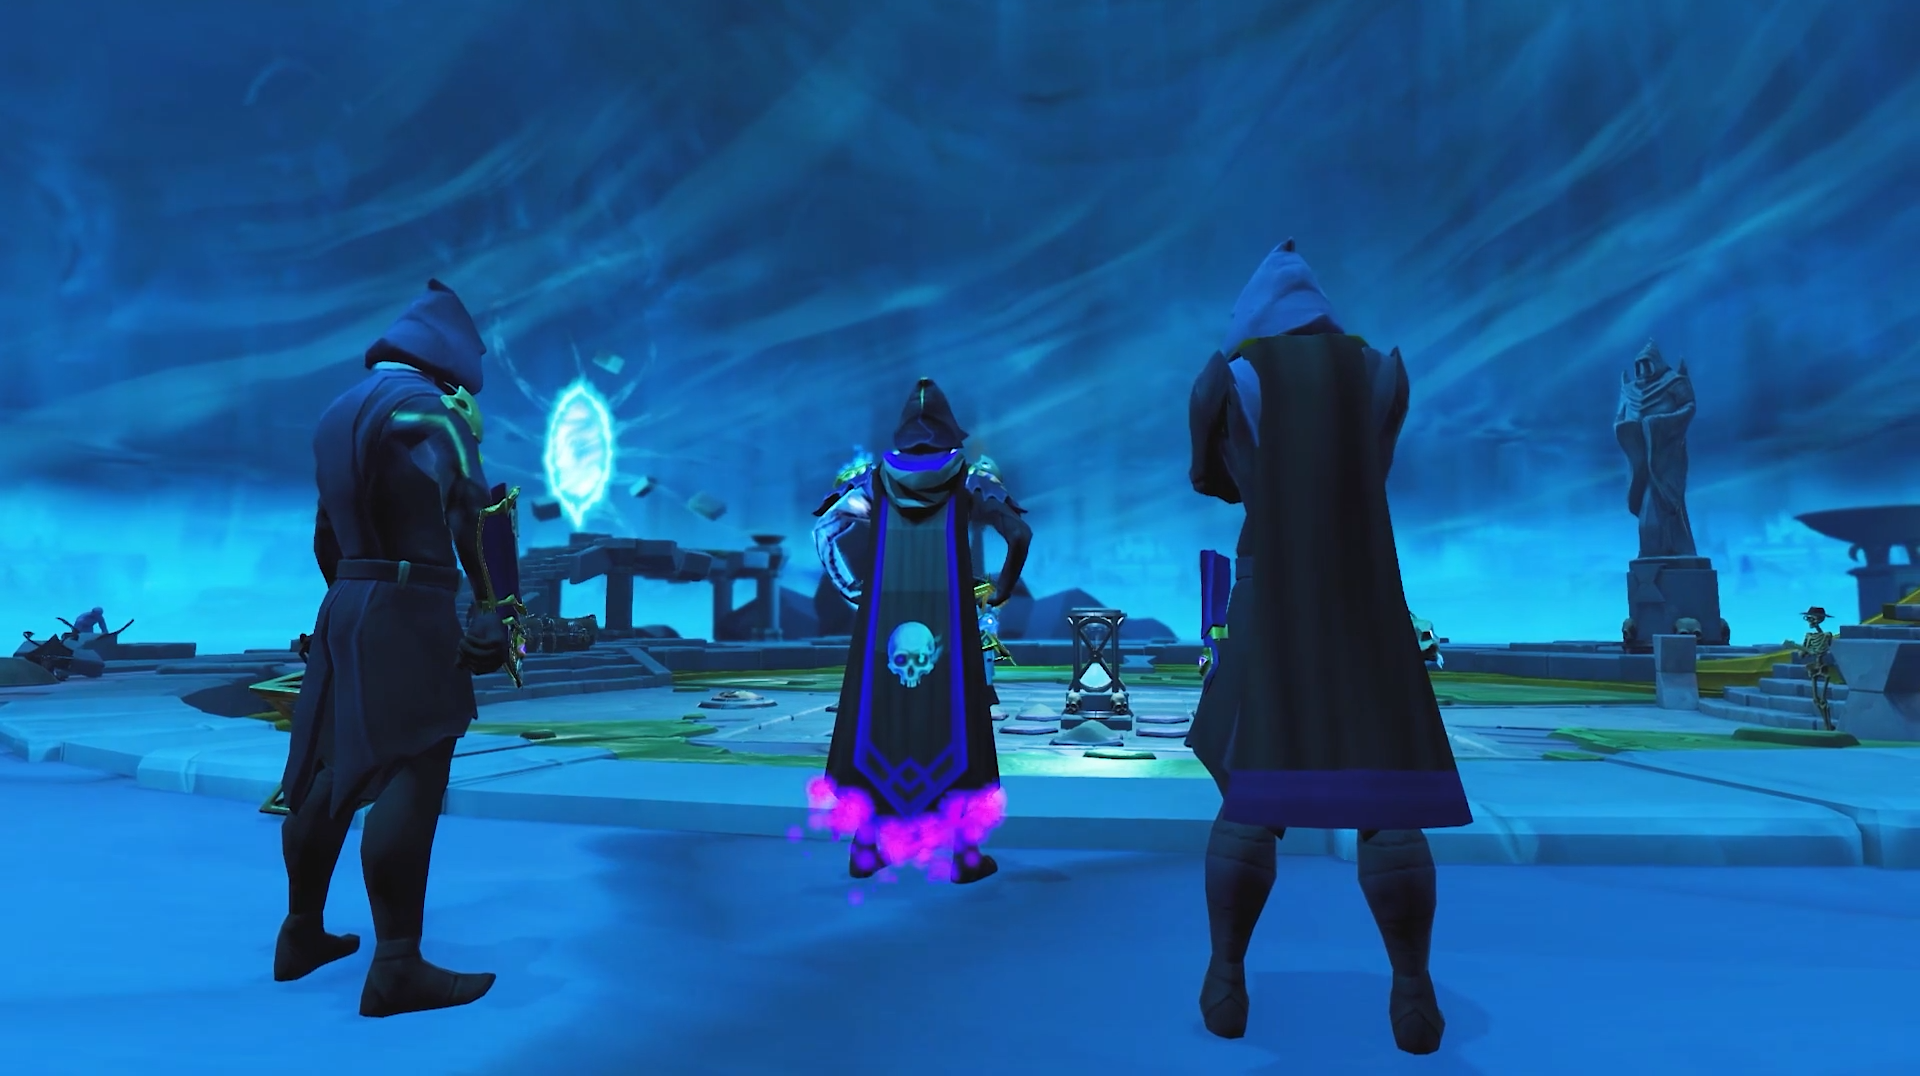
Conjuring up Necromancy has been a long process, and soon our ritual will be complete when Necromancy rises Aug 7!
This will be the fourth combat style for RuneScape, and the first added to the game in over twenty years. What makes this new style different, and what potential does it offer for the future? Time for a deep dive�
Um-charted Territory
RuneScape has never done this before. A new combat style is a hugely ambitious undertaking, especially when you want it to be approachable to new players and gratifying for combat experts.
But we knew it was the right time and the right game for innovation - the world of Gielinor is already blessed with immensely powerful enemies to battle and overcome, and Necromancy offers you a chance to topple these foes in a totally new way!
The system has been built from the ground up, with all players in mind. Necromancy rewards the casual adventurer and the newbie, while also offering an immensely powerful toolset for combat-hardened experts deep into their theorycraft.
Aspiring Necromancers can start their journey into the City of Um and level their way to level 20 in free to play but beyond that it is a members skill. Necromancy is a non-Elite skill, which means there are no prerequisite skills you need to level to get involved (although there are a few that it wouldn�t hurt to have some experience in).
For the combat committed, meanwhile, this skill goes all the way up to level 120 - plenty of Necromancy for you to sink your spectral teeth into! With that in mind, your overall combat level will now cap out at level 152! That�s a big step up.
Approachable To Everyone - Like Death, and Taxes
Starting your journey to become the most powerful Necromancer couldn't be easier.
Necromancy begins with an extensive tutorial, introducing you to all aspects of the skill, along with plenty of story moments to inspire you for the adventure ahead.
Working with combat veterans, content creators, and building on feedback from early playtests, we've refined the tutorial process so it's easy to engage with. Improvements have been made at a system level to ensure that Tooltips are clearer, with an emphasis on clarity in both presentation and wording.
Changes to accuracy, cooldowns, targeting, damage type and more have been included so each description is clear, concise and understandable!
More Abilities - Now And In The Future
As you grow and develop, you'll gradually discover more and more abilities. Each new ability unlock has been paced so it has its own opportunity to shine, letting you learn the nuances and interconnection it has with other abilities before the next one arrives, To help minimise information overload.
We've shifted the focus of combat to make learning manual skills easier, more rewarding, and gratifying - while keeping Revolution* viable at the same time.
Players will be able to use Revolution to automatically fire abilities, but learning when best to manually use each ability will yield the greatest reward. The systems presented with Necromancy are easy to pick up but offer even greater power to those who are willing to experiment.
*For those of you who don't know, Revolution is a system that enables the game to use abilities on your behalf, rather than having to manually activate them yourself.
A Real Handful
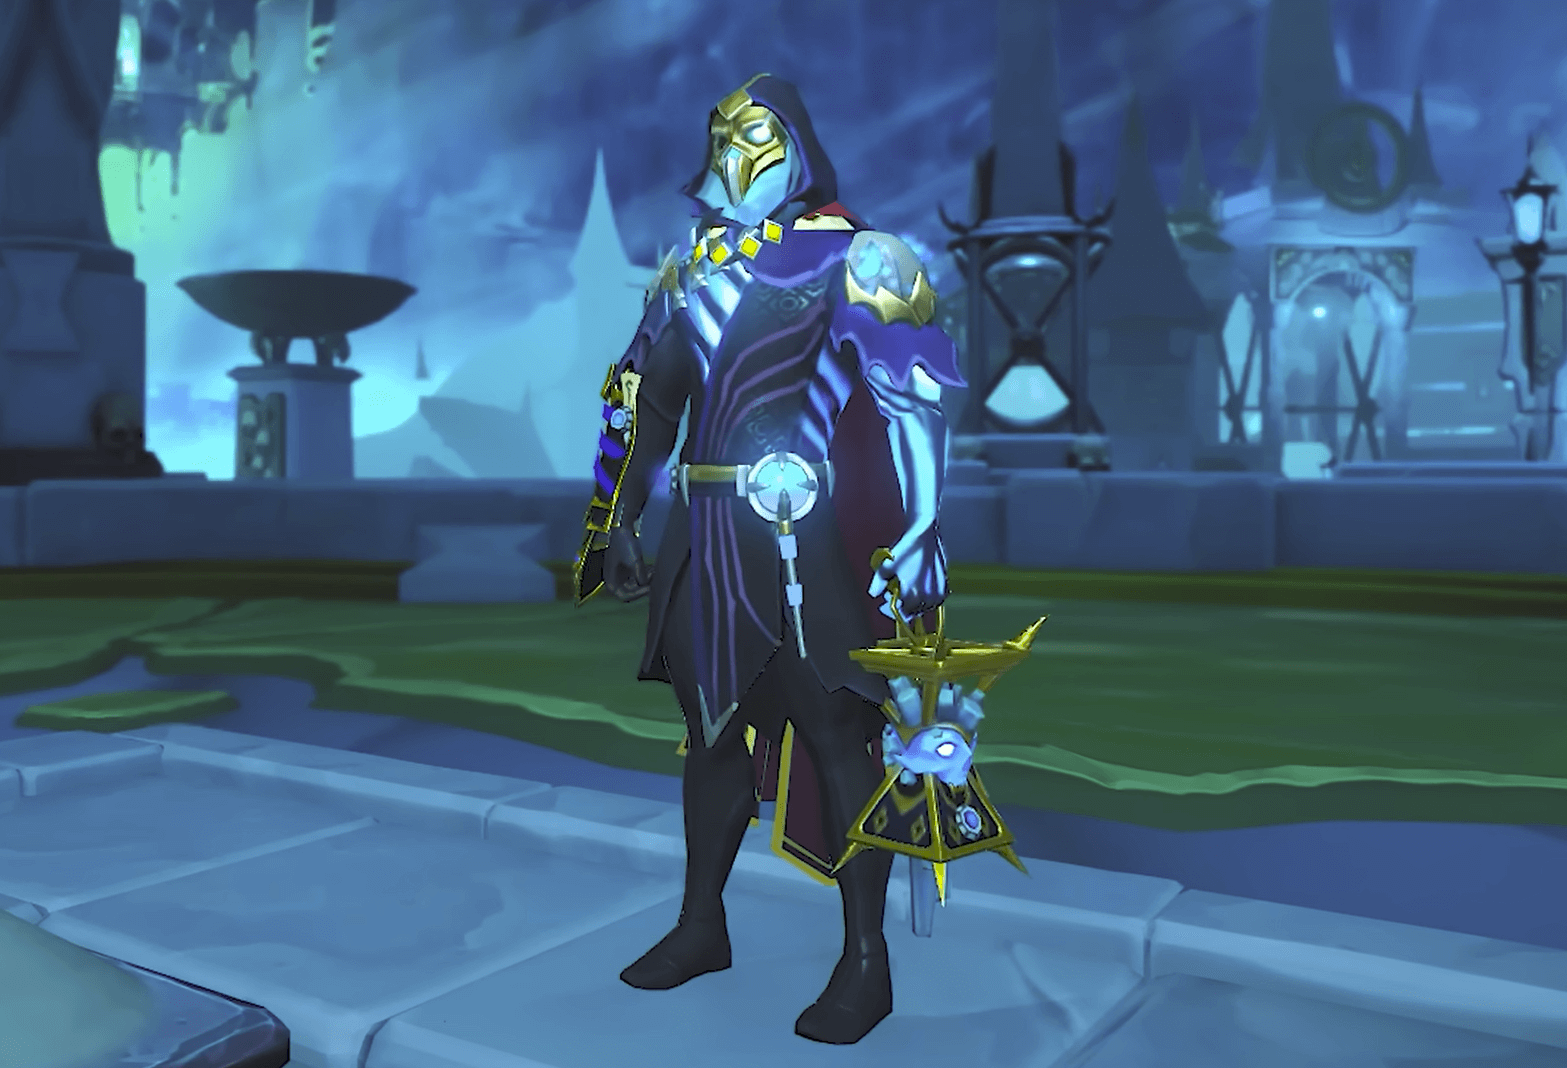
The tools of your newfound power are twofold as you channel both aspects of your new powers through new main and off-hand weapons!
Harness necrotic energy with the Death Guard, and wrench souls from foes while reaving through adversaries with deadly accuracy. This mystical weapon harnesses the powers of the undead to grant its wielder unimaginable strength.
To get your feet grounded you'll start off with a basic attack
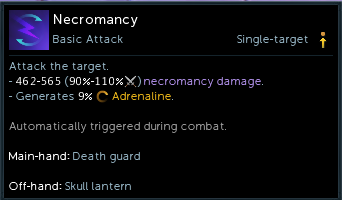
Which fires a blast of necrotic energy and generates adrenaline and soon after, the Finger of Death ability.
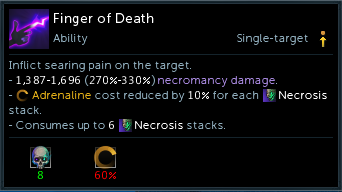
Which spends adrenaline to deal a massive chunk of damage - some classic builder-spender gameplay to get you into the flow.
With Finger of Death unlocking more of its potential as you gain access to more of your necromancy kit, its adrenaline cost is reduced based on how many stacks of Necrosis you have - but, you won't have the ability to generate Necrosis stacks just yet. These interactions begin to unfold and interlink as you level up! Your abilities grow and evolve as you harness your new strength.
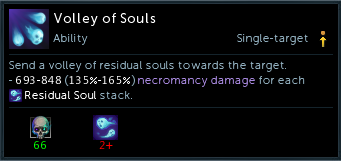
Another example, later in your journey, you can utilise Soul Sap to snatch a soul from your foe to acquire a Residual Soul, before launching it back with Soul Strike, stunning the target and dealing damage.

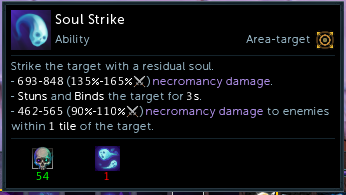
You could, however, continue to deal ongoing damage as you use Soul Sap to add more Residual Souls before launching a full Volley of Souls, dealing massive damage and spending all your Residual Souls at once.
These moment-to-moment decisions empower you to truly play your way - as you grow in confidence and experience, your ability bar fills with new and incredible powers.
We've also moved away from Thresholds in this new Combat Style, as their complexity in adrenaline requirement and cost didn't fit - instead, we're focusing on more standard abilities that simply do what they say, giving you a clearer picture of when is best to use each ability to wreak havoc on your foes.
Illuminating Presence
Next, complimenting that power with the Skull Lantern, your new off-hand weapon! The Lantern�s eerie glow gives wayward souls a guiding light, bringing those freed from the thrall of The First Necromancer to your aid. They�ll then take up arms in their various forms to do battle on your behalf.
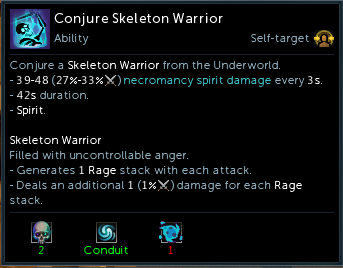
You can use it to conjure a Skeleton Warrior, Putrid Zombie and Vengeful Ghost using the resource Ectoplasm which you gain from Rituals.
Then while you're battling you can use the Command skill to have your conjures use special attacks such as the Putrid Zombie hurling themselves at enemies to explode in a miasma of putrefaction, dealing a huge amount of spirit damage to enemies within range. Utilising these conjures - and their Command abilities - at the right time is a crucial element of becoming the most powerful Necromancer you can be.
But be careful in order to channel and maintain your conjures you must be equipped with your necromancy weapons, swapping will cause your conjures to expire instantly.
Don't worry - you can still use Summoning familiar alongside this! Your Blood Reavers, Minotaurs or Beasts of Burden won't be out of a job.
In fact, as you grow stronger you can have an iteration of each kind of conjured spirit at a time. Lead a squad of undead into battle and let them wreak havoc!
Conjuring warriors to fight by your side is at the heart of Necromancy, and the core tenets of the style will continue to develop and grow as we utilize player feedback and suggestions to build on the skill in the months and years ahead.
Wielding these two weapons and mastering their abilities is crucial to achieving the goal of becoming the most fearsome and venerated Necromancer in Gielinor.
Incredible Incantations
Support your abilities and demonstrate your mastery of the skill with a range of potent new incantations! They work similarly to a Spellbook, amplifying your combat capabilities or opening up new options on the battlefield.
One such incantation is Bone Shield which comes in 2 flavours and allows you to call upon Shield-based defensives without needing to switch from your Death Guard and Lantern.
You can toggle this incantation on to be ready when the moment calls for a defensive - preparation is everything!
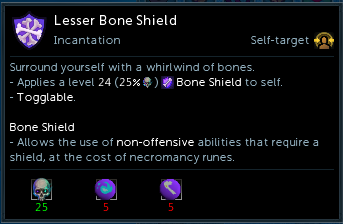
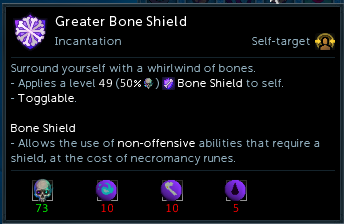
To harness your incantations you�ll need to harness four new Necromancy Runes: Spirit Runes, Bone Runes, Flesh Runes and Miasma Runes.
An example of how this works can be found in another incantation you earn further in your journey - Life Transfer. Utilising Runes, you'll sacrifice 50% of your life to extend your active conjured allies.
A risky choice, but potentially crucial while your conjured fighters battle in your name! Incantations offer even more depth and nuance to your Necromancy experience, allowing you to build a diverse and unique playstyle that's unlike anything you've seen before in RuneScape.
More Greaves, Fewer Graves
Combat without defence would be a fool�s errand. With such a rich and deep combat style as Necromancy, you�ll need armour that can withstand whatever is thrown your way!
Necromancy weapons and armour, can be crafted up to a whopping Tier 90, meaning you won't need the luck of the RNG Gods, or tons of GP, to get your hands on better gear(but they still help!).
As you grow stronger in Necromancy, you will unlock equipment upgrade tasks that - when completed - allow you to improve your gear using materials made through Necromancy and from Rituals.
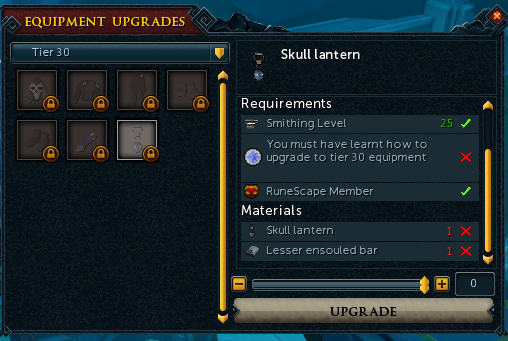
Using pre-existing skills, you'll be able to forge these new weapons and armour to take on increasingly challenging enemies as you level.
With that in mind, you�ll start your path with Tank gear which is more focused on defensive potential (in particular Necromancy Tank gears starts giving a Lifepoint boost earlier then other current tank armours), which you can upgrade as you level through Necromancy.
From Level 70, you�ll be able to make a choice. Stay the course with Tank gear to focus on the suitability or pivot to an alternative Power branch for your armour, which foregoes some armour stats for ability bonuses that empower your attacks further.
Whatever you choose, you�ll be able to get your hands on fully upgradeable gear from Level 1, all the way through to Level 90. You�re probably asking: "Will there be anything beyond Level 90 in gear?" Yes. Tier 95 gear will be coming to Necromancy, but unlike the other Tiers, you'll need to earn these drops by fighting Rasial as a repeatable boss.
The finest of gear must be forged in the crucible of combat - this will be no exception.
Test Your Wight
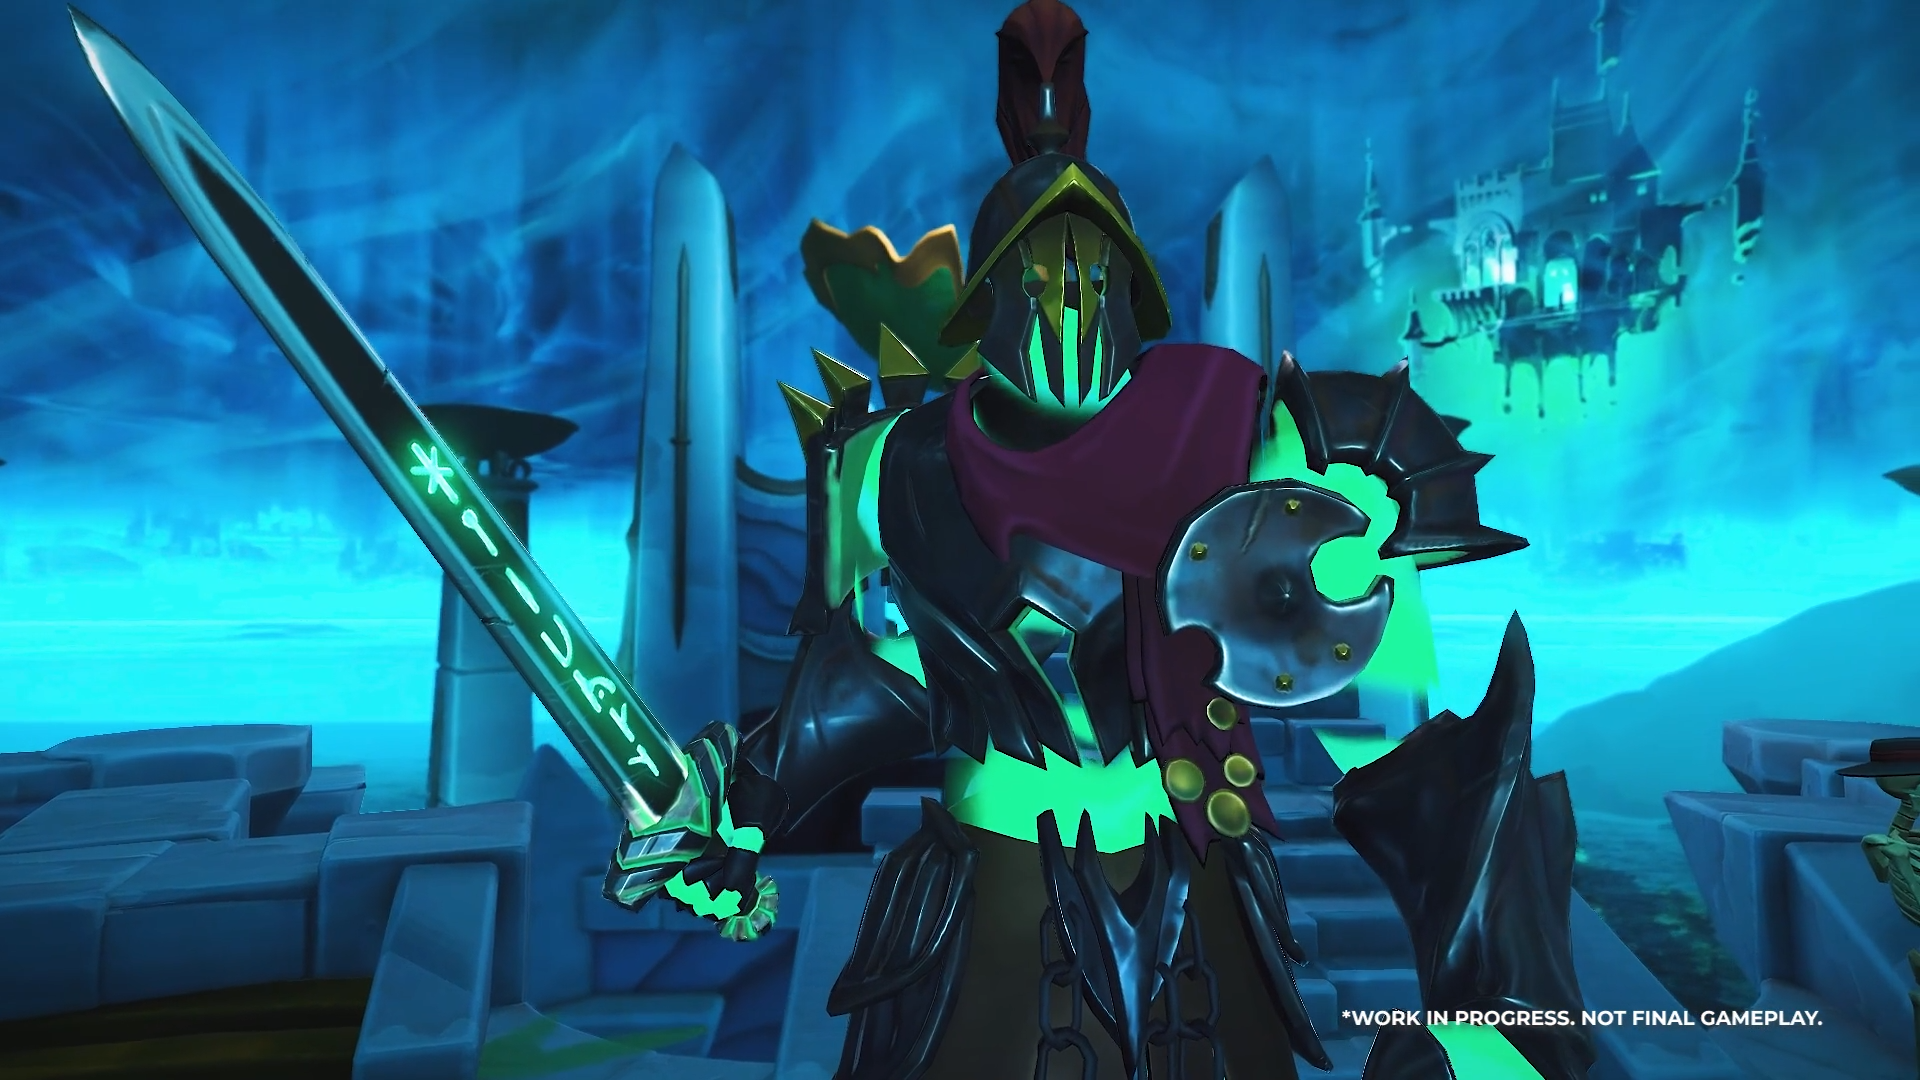
Necromancy tells the story of the City of Um, of The First Necromancer, and you - his apprentice. As you grow in strength, and progress through quests, you'll put your learnings to the test against not one but two brand new bosses that can only be battled with Necromancy.
Our first boss, Hermod, will be a challenge in your Necromancy journey. Hermod is the more approachable boss of the two - designed to be similar in power to a God Wars boss - and is a repeatable boss fight, dropping items and materials to upgrade your gear.
Rasial will be the greater challenge in the later stages of your Necromancy journey, acting as a higher-skill Boss to put everything you've learned into practice. As a repeatable boss, Rasial will be the source of those powerful tier 95 Necromancy gear drops!
From these bosses, you'll be able to earn rewards that help you on your journey - and by being repeatable, act as a great way to hone your bossing craft and test your revenant resolve against them time and time again!
Made for Old Souls and New Necromancers Alike
The Talent Tree system will allow you to grow in strength, channeling the energy of the undead and the souls you free from The First Necromancer�s subjugation into harrowing new powers.
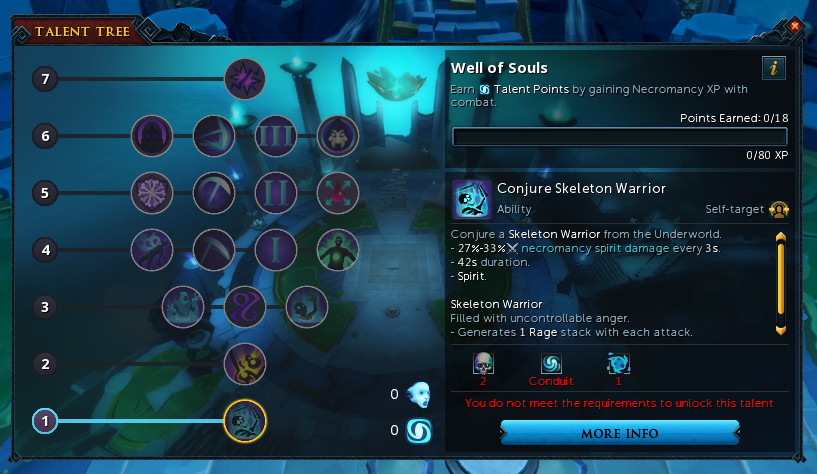
Here you�ll be able to upgrade and develop your conjuring skills, as well as unlock totally new incantations and abilities throughout the tree. Talent Points, used to unlock Talents, are earned via combat - and you unlock new tiers by filling the Well with souls via rituals.
With a lot of choices on offer as you level, you'll be making meaningful decisions on how to grow your power as you level up in Necromancy.
But don�t worry, by the time you master the skill, everything on the tree will be unlocked - you won�t miss out on any of the incredible abilities up for grabs.
A Challenge, Undertaken
In our First Look blog, we initially stated that we were limiting Necromancy combat xp rates to better preserve the journey of Necromancy and deliver that feeling of progression you want from a new skill. Learning from Archaeology, we're aiming to create a deep, fulfilling levelling experience.
This was originally going to be achieved by an artificial reduction in experience tied to levels - but instead, thanks to the hard work of the team, we have instead overhauled the combat experience system at its core!
Our goal is to deliver a more balanced, engaging and understandable experience flow - not just for Necromancy, but across all combat skill - this will launch alongside Necromancy
We have iterated on an HP-based XP system (which may be recognisable to long time veterans or Old School-ers) wherein the greater the foe's HP, the higher the XP yield for defeating them - currently at a rate of 50Xp to 1000 Health.
This directly scales with your damage dealt to the target, so your contribution to defeating an enemy is fair and reflected in your reward (meaning that to get the full experience you won't be able to swap styles or have someone else defeat the monster). To this end, several monsters have had their stats rebalanced to be more inline with modern standards.
This system is also more elegant and understandable, making XP calculations easier for both developers and players to grasp in future!
If you're looking to theory craft based on these new calculations, the Wiki has been provided this information in advance so you can start diving into all the details. Find out more about the changes to monsters here and the combat experience here.

We will also be launching a range of bugfixes at specific areas that affected XP rates - yes, including you, Shadow Reef!
Additionally, core combat systems you're familiar with have been completely reworked in new and exciting ways that make the systems easy to get to grips with.
Currently, existing combat styles deal basic attacks automatically in a cycle when not using an ability. You'll rarely see these if you're using Revolution to continually fire off abilities as they come off cooldown.
Necromancy will bring the basic attack to the forefront, turning it into an ability that's automatically cast for you when you aren't pressing an ability. It incurs a global cooldown, but generates 9% adrenaline - like Revolution, but for one ability. This becomes the �filler� ability that's always firing between your manual inputs, ensuring that you keep a consistent damage output while you consider your next move.
You can even disable the automatic firing if you're so inclined!
On top of this, we've made major changes to how accuracy functions in Necromancy. Your abilities will consistently hit, but accuracy now dictates how successfully your attacks find their mark. Damage will scale down to a minimum damage floor based on your accuracy.
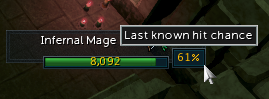
Your attacks will land, but accuracy will now inform how much of the attack got through to your target. Tooltips have been adjusted to showcase a clearer indication of how this works.
We've adjusted critical strikes, too! Necromancy has a base critical strike chance of 10%. When you hit a target, you're rolling a 10-sided die to see if it should be a critical strike, and if so, we apply a 1.25x (or +25%) damage multiplier to the attack.
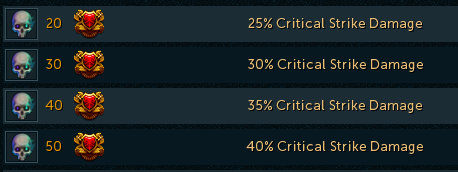
This critical strike damage increases as you level Necromancy, all the way up to a critical strike dealing 1.75x (or +75%) damage. This also applies to existing critical strike systems, so for example, biting gizmos from Invention, Erethdor's Grimoire and Reaver's Ring will all work alongside these systems!
These systems are currently only going to be active with Necromancy but if the playerbase resonates with them we can look to include it in other combat styles.
Necromancy Experience Embargo
In order to maintain a healthy race on launch, XP-boosting rewards unlocked through gameplay* will work with Necromancy, any rewards which award direct or bonus XP will not work with Necromancy. The following experience boosting systems will not function for Necromancy:
- No bonus XP gains during the embargo
- Fort Forinthry rested state
- Prime Gaming rewards (e.g. umbral chests)
- Treasure Hunter stars
- No direct XP during the embargo
- Quest reward XP (e.g. quest lamps)
- Jack of Trades aura reward
- Prime Gaming rewards (e.g. umbral chests)
- Treasure Hunter lamps
- Existing combat daily challenges
- Tears of Guthix (minigame)
- No XP boosting item earned via purchases
- Premier artefact
- Pulse/cinder cores
- Wisdom aura
- Festive aura
- Enlightenment aura
- Desert Pantheon aura
- Skilling backpack
- Rock of Resilience
- Misc
- No DXP Live events
- Refer a Friend bonus
- Demon slaying outfit
- Ghost hunter outfit
- Sceptre of enchantment (and variants)
- Scrimshaws of sacrifice/corruption
*Some items on this list are unlocked via gameplay and generally would be allowed but the reason for these items not being able to be used as they are not direct unlocks which the player can earn, they are reward items which are given to the player via various methods or luck. All items which are allowed can be unlocked by players via in-game and/or skill advancement.
The following experience boosts will function with Necromancy:
- Inspire Awe relic power
- Torstol incense sticks
- Wise Invention perk
- Bik god book
Um-like Anything You've Seen Before
We�re so excited for you to be getting to grips with the fourth combat style, and the season of Necromancy that will follow. This is just the beginning: over time, we�ll be developing the skill even further, with new gear and abilities introduced as the skill evolves, offering alternative playstyles for Necromancy.
Most of all, we�re excited to see what you, our incredible �Scapers, will do with your newfound abilities. There�s so much to explore, and we know you�ll take this new skill in the most creative and exciting directions!
Get ready, folks. Your journey to become Gielinor�s greatest Necromancer begins right here on August 7th�